20 November 2010

pineapple quince

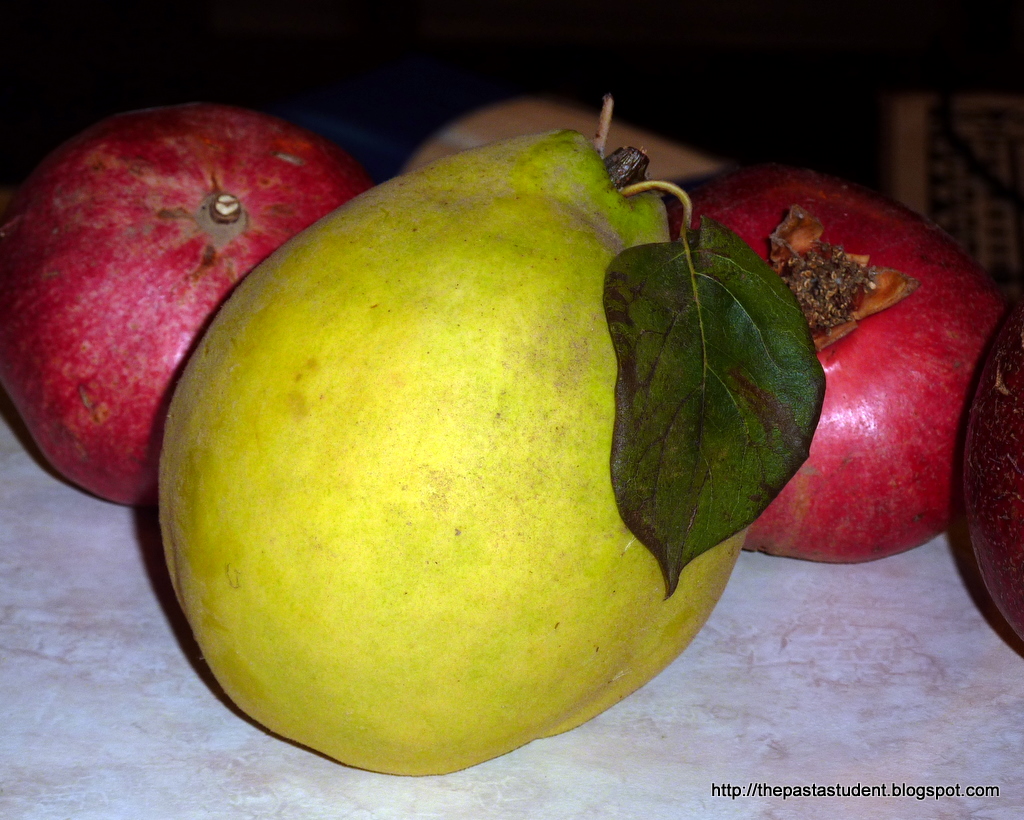
A pineapple quince (in the background are
pomegranates, also from our CSA)
Arrived in our CSA box three weeks ago were a couple pineapple quinces!  This was very exciting for me as although I have heard of and even seen quinces before, I have actually never ever tried one. I don't even think I've had any food made with quince before, at least none that was memorable. Anyway, I was so excited by these unusually large (compared to the "normal" quince that I've seen at the shops) delights that I did a little research and discovered two quince characteristics that intrigued me even more: 
1)  They apparently have an amazing floral fragrance, and 
2)  They blush!  (the cooking process apparently turns them an amazing crimson colour).
Despite my tired pregnant state, this got me back into the kitchen =)   I made two things out of the two quinces: 


Two containers of dulce de membrillo
from a single quince. 
dulce de membrillo
The recipe I tried was inspired by The Traveler's Lunchbox, which was very similar to many of the other recipes on the internet; this is unsurprising as this spread is really simple to make!!  The reason for this is that quinces are naturally rich in pectin allowing them to be turned into jelly extremely easily. The only things I did differently were:
1)  I added the juice of a lime, prompted by a separate article I read, and 
2)  I only added about 1/4 cup of sugar (much less than asked for) for the one quince I had (I don't have a kitchen scale so did not measure the exact weight of quince or sugar).  
It turned out fantastically!!!  The only disappointment was that the membrillo did not turn as red as I had hoped. I attributed this to this particular variety of quince.  Nonetheless, I was happy with how they turned out and was eager to try them with some manchego cheese we bought just for this =P  Coincidentally, we were able to share the first batch with some friends, one of whom was Argentinian and I was delighted to watch her snack on my dulce de membrillo as she told us how her family used to make these all the time =)  


Poached quince
poached quince with vanilla and cinnamon
For this, I adapted the recipe from the wednesday chef. Interestingly, this was actually the first time I cooked with vanilla beans as well (I've always just used vanilla essence)!  I was delightfully surprised by the vanilla's aroma!  Between this and the cinnamon, the aroma of the poached quince was just heavenly.  Unfortunately, as with the dolce de membrillo, the only disappointment was the lack of ruby hue I was really hoping for =(  Although no icing on the cake, the cake still tasted darn good ;-) 
We drank most of the syrup as we ate the quince though the wednesday did suggest stirring it into tea (I'm sure it's a really good suggestion if you are a tea drinker who also happens to add sugar to your tea). 


The notable absence of these delights in our subsequent CSA boxes saddened me... but then, I saw them at the Farmer's Market =D  I think poached quince will be on our (first) Thanksgiving menu this year =) 

07 September 2010

salmon and cucumber filo

After several disappointments, we recently decided to join yet another CSA: Nevermore Farm.  Two things that set this one apart from the others were: (1) it was recommended by a friend, and (2) they were amazingly obliging! One of our problems with CSAs in the past was that we often get way more veggies than we can consume. But Nevermore was able to fulfill our requests of a delivery only once every two weeks and for each box to have a higher fruit to veggie ratio (it is much easier to snack on fruits than veggies!)!! We received our first box last Thursday and we were very satisfied =)
One of the intriguing ingredients that came with the box was two funny looking cucurbits. Several Google image searches suggested they could be Armenian cucumbers.  Neither of us are really cucumber fans and despite cyberspace's positive opinions, we failed to see their uniqueness... However, not one to waste food, we decided to make something out of it, and this is when I came across this recipe: Smoked Salmon and Cucumber Nest. As with most other recipes I find, I modified it based on what I had at home at the time.  Although I don't know how the original recipe would have tasted, I quite enjoyed my version ;-)  I especially like this recipe because (1) it was dead easy to make (meaning I was not grumpy to cook after a long day's work), and (2) it was healthy!

ingredients
1/2 can ~15oz (425g) pink salmon in brine (we made two meals out of this can)
2 sheets of filo pastry
1 cup of coarsely grated cucumber
1/4 cup crumbed feta cheese
Melted butter

procedure
1.  Prepare filling: Using a fork, shred the salmon. Squeeze out as much water as you can from the grated cucumber. Combine and mix well the salmon, cucumber, and cheese.  
2.  Prepare the "nest": Cut the sheets in half to make four sheets. Stack the four sheets on top of each other, brushing each layer with melted butter. Divide (cut with a sharp knife) the stacked sheets into six equal sized rectangles, each large enough to fit into your muffin tins. Gently pressed them into six holes of your muffin pan; they should be like cupcake cups. Bake until slightly golden at temperature according to the filo manufacturer's directions
3.  Take the slightly golden filo cups out of the oven and fill each cup with the salmon and cucumber mixture. Return to oven and bake for another 3-6mins or until filo has reached desired browness. ( Alternatively, one could bake the filo cups until done, fill the cups with the mixture and serve without rebaking. )
4.  Gently remove from muffin tin and serve immediately. 

Enjoy. 

18 June 2010

wild rice salad with dried and fresh fruits and nuts

People keep telling me that white rice is empty calories, so in an attempt to add the nutrition back to my rice, I bought a pound or two of a blend of wild rice from the local Co-op.  I no longer remember what's in the blend (I'll jot it down next time I am at the Co-op), but it looks like there are some long grain brown rice and black japonica. Anyway, I got it about a month ago and haven't really done anything with it, and increasingly I felt like it was time...  Initially I was thinking of a warm rice dish similar to a Chinese fried rice but with dried fruits, such as sultanas or dried cranberries, and roasted nuts.  Google searches turned up mainly salad dishes and given the weather has been rather warm this week, I decided to give it a whirl.  The recipe that caught my eyes was this one: http://www.healthyfoodforliving.com/?p=8358 and that's mainly because of it's simplicity and lack of overpowering spices. As usual, I made modifications to this recipe and to my surprise, my hubby loved it;  he normally doesn't like wild or brown rice because of the rough texture, but he seemed to really like the flavour of this one.  I hope I get a chance to make it for my new mother-in-law because we think it is something that she would totally enjoy =)

Ingredients
Salad:
* 1 cup wild rice, rinsed
* 2 cups chicken broth (it took some effort to find one without onions!)
* 2 cups water
* 1 cup dried cranberries (I had also wanted to used sultanas but it was easier to find organic cranberries than sultanas)
* 1/2 cup pistachios, shelled, toasted, and roughly chopped  (pistachios is a good source of choline)
* 1 large apple, cored and chopped (in retrospect, a sweet soft pear would have been much more fitting)
* 1 large nectarine, stone removed, chopped (it's stone fruit season, so I had to make use of this lovely fruit)
Vinaigrette:
* 3 tbsp extra virgin olive oil
* 2 tbsp balsamic vinegar (the recipe did recommend a fruity vinegar but I didn't have any, so I may try that next time)
* 2 tsp honey
* salt to taste


Procedure
1.  Bring broth and water to boil.  Add rice, stir, and let liquid return to boil. Reduce heat to low and simmer for 45mins. Drain liquid and rinse briefly under cold water. Place in a large bowl.
2.  Place all vinaigrette ingredients in a small jar.  Shake well to emulsify.
3.  Stir chopped fruits, dried cranberry, prepared nuts, and vinaigrette in with the rice, until well mixed.
4.  Serve immediately at room temperature or or cold after 'marinating' in fridge.

** Keep leftovers in an airtight container.  If planning on having let overs or serving cold, it is best to mix in the nuts just before so they remain crunchy.

** We actually had it with grilled Italian sausages; it was a great combo. 

Enjoy.

15 June 2010

spanish tortilla

The day following the 'spanish craving' post, I was still in the mood to make Spanish Omelet for two main reasons:  1)  we have a new Chantal Copper Fusion pan and I really wanted to try it out by cooking eggs, and 2) I have both eggs and potato at home!  So, I went ahead =P  Luckily, hubby was in the mood for Spanish Omelet that night too; phew! =)

Chantal Copper Fusion 10 inch Fry Pan:
I just wanted to say a few words about this pan... I was careful to keep the heat below medium, as recommended by the manufacturer and also to heat the oil with the pan.  Unfortunately, I have one of those electric coil stoves, so it's not always easy to gauge the temperature.  Yesterday when making the Squid Stew with the 5-Quart Stockpot of the same make, I had the heat up right on medium and it took ~2-3mins to heat the entire pot.  Tonight, with this frying pan, at the same heat, it took only ~30secs to fully heat the pan;  this unfortunately meant my pan was hotter than I expected when I added the potatoes and veggies and so subsequently led to some stickage.  I had to keep stirring (with a little scraping with my plastic spatula) to prevent too much sticking.  Despite this, I was well aware that, because of the water and starch content, potatoes always stick, so I was not too disappointed with the pan.
To ensure the omelet wouldn't stick also, I washed the pan between cooking the potatoes and the omelet.  Again, I was careful to not let the pan cool too quickly with cold water when I was cleaning it.
With the experience from just minutes before, I heated the pan at a lower heat and kept a close eye on the pan while I heated it with a good drizzle of oil.  At the very first sign of a warm pan, I poured in the omelet and let it cook untouched.  I must still have had the heat on too high because the pan smoked a little as the omelet cooked; I had to further lower the heat.  When it came to the flipping, it did stick a bit.  We had to guide the omelet gently off the pan with a spatula before we could flip it successfully.  But all in all it wasn't as bad as it could have been:  it only took a little prompting with the spatula to release the omelet from the pan and the omelet didn't break =)  The other side stuck less too.
I admit it was probably very ambitious to cook an omelet on a enamel pan for the first time =P  I can't wait to try the pan again with scramble and sunny-side-up eggs!!
Anyway, here is the recipe for the Spanish Omelet.
** This recipe was adapted from http://spanishfood.about.com/od/tapas/r/tortilla.htm


Ingredients
1 medium sized potato, peeled and finely sliced (~1.5"x1/4"x1/8" = 4cmX1cmX5mm)
6 spears of asparagi, finely chopped (~1cm cylindrical length)
1 small zucchini, finely chopped (~ same dimension as potato)
4 medium eggs, whisked
olive oil

Procedure
1.  Toss potato, asparagus, and zucchini in a large bowl with salt (& pepper).  Cook in well oiled pan on medium heat; if heat is too high, potato will burn before cooking through. Stir constantly to ensure the potato pieces are not sticking together, until potatoes are completely cooked (i.e. does not snap when breaking with a spatula).  Transfer from heat into a large bowl.
2.  Mix whisked eggs with the cooked veggies.
3.  Heat a good drizzle of oil in a clean pan on low to medium heat.  Pour omelet mixture into pan.  Let cook until the bottom is slightly browned.  Heat may need to be reduced if it looks like the bottom is browning quicker than the egg in the middle is setting.  Only attempt to check the bottom of the omelet when the edges are done! When it comes to flipping, the middle of the omelet may still be runny (don't worry).
4. Flipping: the above link has a good method for flipping the omelet which involves placing a flat plate as large as the pan over the pan and flipping the omelet onto it, then sliding the omelet back onto the pan with the uncooked side on the bottom.  We find this method works pretty well. The only caution is to ensure the omelet is not sticking to the pan before flipping; if there is stickage, gently detach the omelet from the pan on all sides with a spatula.
5.  Let the omelet cook on the second side until it is also browned; the time required should be much less than required for the first.  Once done, carefully slide or, using the previous method flip, the omelet onto a serving plate.  Cut like a pizza to serve.

Enjoy.

14 June 2010

spanish craving

Tapas.  Apparently that was what the man's been craving.  But although it would have been nice to go to the (only) Spanish restaurant in town, I was in the mood to cook; mainly because we just got a set of Chantal Copper Fusion =)   Given what I had in the fridge, the first thing that came to mind was Spanish Omelet (also known as Spanish Tortilla here in America), but apparently "Spanish Tortilla is not really the first thing I had in mind" when thinking about tapas. So, thinking about what he likes and researching on the most common tapas, squid came to mind.  From several Google Image searches, I decided a Spanish Squid Stew would be perfect (though I also decided not to mention it to him in case it is also not what he had in mind!).  Since the stew seemed to be lacking in veggies and since there is kale in the fridge, and another quick Google search suggested a Kale Adobo would be good accompaniment.
The squid stew turned out to be much better than I expected; especially given I don't normally like squid due to its chewy texture.  The kale, on the other hand, was only mediocre and I think that may have been due to the Southern twist in the recipe that I didn't really like -- addition of bacon.  I tried substituting it with Spanish Ham but alas, I was unable to find it within Davis; the best I could do was not use the normal North American bacon (which has an insanely high fat to meat ratio) but instead used another American invention: Turkey bacon.  It was much leaner and from past experience still has a pretty good flavour.  Nonetheless, Spanish Ham would have been much better, I'm sure.


Squid Stew
** This recipe was adapted from http://uktv.co.uk/food/recipe/aid/512679
Ingredients  
2 tbsp olive oil
1 clove garlic, crushed and finely chopped
5 fresh sage leaves
3 tomatoes, diced
750g squid steak (~2 medium sized), cubed
500g medium sized prawns, shelled
black pepper
1/2 cup cream sherry (the original recipe asked for 1.7L Manzanilla sherry, but I didn't have any and I wasn't about to use 1.7L of it given my pregnant status!)
1/2 - 1 cup water

Procedure
1. Heat olive oil in a heavy pot (I used the Chantal Copper Fusion 5-Quart Stockpot). Add garlic, sage and tomato, stirring until the garlic has softened.
2. Add the squid and prawns, season with salt and pepper. Stirring until squid & prawns are well mixed with the tomato sauce.
3. Add sherry and water.  Bring to the boil.  Reduce heat and simmer uncovered for around 1 hour until the squid is tender and the sauce has thickened and reduced.


Bacon and Kale Adobo
** This recipe was adapted from http://find.myrecipes.com/recipes/recipefinder.dyn?action=displayRecipe&recipe_id=1842401
Ingredients
6  ounces (~6 pieces)  smoked cured Turkey bacon, finely chopped
1 clove garlic, crushed & finely chopped
2  bay leaves (I used dried because that was all I had)
1  pound (~400g)  kale, finely chopped
2  to 3 tbsp soy sauce
2  to 3 tbsp balsamic vinegar
freshly ground black pepper
finely grated Parmesan cheese (optional)
Procedure

1. Cook bacon over medium heat in a large pan until crisp and most of the fat has melted into oil.  Remove bacon, draining fat back into the pan.
2. Add garlic and bay leaves and cook over medium-high heat. Toss in kale; cook, stirring, until wilted. Stir in 1 cup water, half the bacon, soy sauce, vinegar, and pepper. Simmer, covered, until kale is to desired tenderness (I cooked mind for ~20-25mins).
3. Serve with remaining bacon & cheese.

31 May 2010

mashed roots & stems

Another spontaneous moment:  I am not normally a potato kinda gal, but i was getting bored of rice & pasta.  I recall my little sister used to make really good mashed potatoes, so I decided to give it a go.  However, to lessen the earthy flavour of the potato, I decided to add a carrot that I had handy in my refrigerator.  To accompany the mashed potato, I decided to pan-fry up one of the pieces of chicken thighs in my freezer with some handy spices in my pantry (lemon herb).  The only thing that was missing was leafy greens, so a couple large collard green leaves were also pulled out of the fridge.  It is sooo good to have fresh ingredients handy in the house!!!  As the other half doesn't generally like the thick stems of green veggies, I decided to dissect them out and add them to the mash potato+carrot: ingenious! ;-)   Here is how I did it:

Servings: 2

Ingredients 
Mashed roots + stems
1 medium sized yellow potato, roughly cut into several pieces (I prefer to leave the skin on)
1 medium size orange carrot, roughly chopped into large pieces
stems of 2 large collard green leaves, also roughly chopped into large pieces
1 tbp butter
1 pinch salt
Collard greens
leaves of two large collard greens, roughly chopped into ~1"x1" squares
1 pinch salt
drizzle of olive oil
a tbp spoon of butter (optional to add flavour) 
Lemon chicken
1 moderate sized piece of chicken thigh
olive oil
generic lemon & herb (or lemon & garlic) salt


Procedure
Mashed roots + stems
1)  Stem potato, carrot, and stems in a steamer until tender
2)  Transfer tender roots & stems to a bowl (or plate) with a flat bottom;  add the tbp butter;  mash with potato masher
3)  Keep warm in oven (low heat; ~250F or ~120C)
Lemon chicken
1)  oil both sides of chicken thigh
2)  sprinkle on the lemon+herb salt on both sides; set aside for ~5mins (while you prepare the other two components)

3)  heat pan to medium heat with olive (or other veggie) oil
4)  sear chicken;  make sure one side is completely seared before turning (there should be minimal sticking to the pan when it is ready to be turned!)
5)  check doneness; once done, transfer to a plate and set aside to rest
Collard greens
1)  Use same pan that the chick just vacated; add oil (and butter)
2)  Add collard greens;  stir occasionally to prevent sticking and to ensure even cooking;  cook until lustrous green
3)  If prefer softer greens, add 1-2tbp water and cover with lid for a couple minutes
4)  season with salt (and optionally pepper)


Plating
1)  Spoon and distribute mashed roots+stems onto the middle of two plates
2)  Spoon and distribute the collard greens atop the mashed potato
3)  Cut the chicken tight in half and add on top of the pile of mashed potato and greens


As a treat and for dessert, I also made raisin oat cookies =P

Enjoy.

30 January 2010

black chanterelle with pork chop

It's been a year since our last black chanterelle experience. At least in Davis-California, these delights, also know as black trumpets, seem only available for a short period of time in the winter. We were happily surprised to see and purchase the last bag today at the Farmers' Market from the local mushroom man. While rain is generally good for shrooms, it rained so much over the last two weeks that I had expected most mushrooms to be destroyed. Following a solid week of rain last week, we took opportunity of a few hours of blue sky and went hiking on the Stebbins Cold Canyon Blue Ridge trail. The five miles (8.05km) of slippery mud aside, we were delighted and disappointed to see so many soggy mushrooms =(   No joke, we saw mushrooms every step of the way, but all were destroyed from having absorbed too much water.   Thus, as you can imagine, we were truly delighted when we saw the last bag of black chantalles at the Farmers' Market =D

Recalling our last preparation of these lovely devils, we promptly biked over to the Co-Op and purchased two pork chops for this evening's dinner.  But not before getting some seasonal collard greens =)

Servings: 2

Ingredients: 
Black Trumpet
1/8lb (55g) fresh black chanterelle
1tbp butter
pinch of salt
Pork Chop
2 pork chops
1 clove garlic
1tsp dried rosemary
1 tbsp olive oil
pinch of pepper
pinch of salt
Collard Greens
5-6 leaves of collard greens
1 clove garlic
1 tbsp butter
dash olive oil

Procedure:

Pork Chop
1) Pre-heat grille to 350 - 400 Fahrenheit
2) Grind rosemary, olive oil, pepper, and crushed garlic into a paste with pastel and mortar. Rub into pork chop.

3) Cook on grill until internal temperature reaches at least 145 Faherheit.
4) Set on plate and let sit for at least 5mins.
Mushrooms
1) Soak mushrooms in warm salted water and rinse of dirt
2) Heat olive oil and butter over skillet
3) Sauté mushrooms for 4 - 5 mins
4) Season with salt. Stir. Turn off heat.
5) Top onto pork chops on serving plates.
Collards1) Heat skillet with butter and crushed (or finely chopped) garlic
2) Add chopped collards. Stir. 
3) When greens begin to brown (or stick to pan), add ~2tbsp water and let evaporate. Continue stirring.
4) Stir in pepper and salt.  Turn off heat.
5) Add to serving plate.

Enjoy.

03 January 2010

winter veggie root stew

It's winter again... True that I am no fan of the cold, but I must admit, the winter vegetables available here in davis, ca, is beyond my imagination! For our first grocery shopping in 2010, we went dutifully to the Co-op. To our delight, we noticed several more varieties of root vegetables, and almost immediately, a hearty veggie stew came to mind. For this stew we tried out a couple veggies that we have either never seen or never tried before, including the romanesco broccoli and watermelon radish. Because these are seasonal veggies, they were inexpensive: most costing between $0.80 - $0.90, with the most expansive ingredient being the romanesco costing almost $5.00 per head.

Despite the cost, the texture and flavor of the romanesco was fascinating; well, having never even heard of this vegetable, I was surprised to find that it tasted very similar to the cauliflower, but sweeter. The watermelon radish was also a delight: cutting the radish in half immediately explained where its name came from! The other veggies were equally tasty. And the stew as a final product was spoonfuls of sweet, healthy, comforting goodness =D

Here is how I made it:

Ingredients
1 celery root
1 golden beetroot
1 watermelon radish
1 parsnip
1 sweet potato
1 hailstone radish
5-6 stalks of celery
1/2 head of romanesco broccoli
6-8 button mushrooms
1/2 cup chopped rainbow chard stalks

1-2 springs of dried rosemary
1 small dried red chili
2-3 cloves of garlic
1/2 cup brown rice
pinch s&p

Procedure
1. Start boiling 8-10 cups water in a moderately large pot
2. Wash and chop all vegetables (~2cm or 1" cubes); add to the pot of water
3. Finely chop rosemary, chili, and garlic; add to soup
4. Add rice to soup
5. Once boiling, reduce heat and let simmer for 30min, stirring occasionally, adding more water (1/4 - 1/2 cup) if evaporating too quickly (if veggie & rice begins to stick to bottom of pot).
6. After 30mins, most of the veggies would have softened and started to break apart and the rice should also be soft (for brown rice standard). If not, simmer for longer (maybe another 15mins). Otherwise, turn off heat. Stir in salt & pepper to taste.

May be served with a tbp grated cheese (Parmesan or Cheddar) and/or a glass of Cabernet Sauvignon.

Enjoy.