30 July 2015

sourdough pizza

I finally understood what a mature sourdough starter is. When I checked on my starter this morning, approximately 24hrs since its last feeding,  it clearly increased in volume! It looked as if it was beginning to bubble itself out of its home (a 2 cup Pyrex container).
It was screaming "pizza night"!  
I didn't have enough time to mix the dough in themorning and let it rest for hours. Nor did I have any bread flour on hand.  A 5 min Google search brought me this recipe.  Unsurprisingly,  I altered it:
- Only one cup of the starter was used instead of 1.5c (mostly because I didn't have enough and wanted to leave sufficient to continue the starter)
- An extra cup of wholemeal flour (total of ~2.5c) was added, partly to compensate for using less starter and also because I wanted to make two pizzas
-  The total amount of oil used was 1/2c (it called for 8 tbps)
-  1/3 - 1/4 cup of water was also added to reach the desired consistency (enough to form dough into a ball but not damp or crumbly)
-  Aftet ~5-10 mins of kneading, the dough was allowed to rest while pizza toppings were prepared
-  2 large thin pizza bases were rolled out of it

To my delight,  the pizza rose on the pre-bake! Oh, glorious bubbles!!
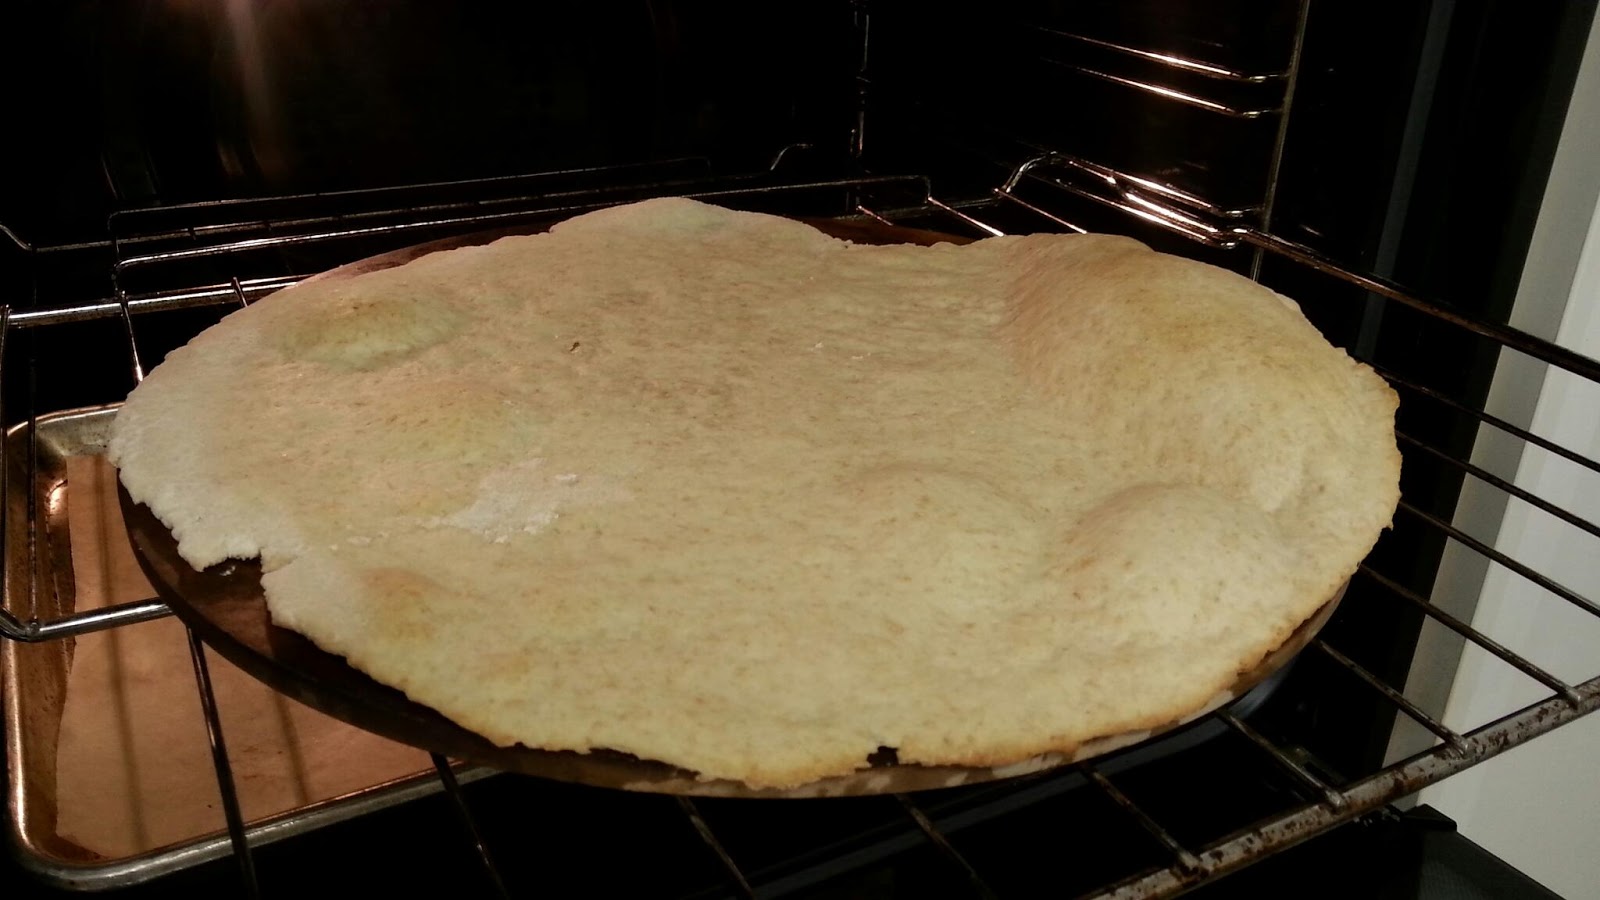
The rest was easy :)  The usual favourites were added, including plain tomato paste, artichoke,  pepperoni,  and lactose-free cheese. 

The final result was definitely well received :-)  The base was flaky!  The added oil (canola) was suggested as a contributing factor to the flakiness. I think I agree. Most importantly,  the general consensus was it's not too flaky;  it was delicious

25 July 2015

Sourdough Bread

Average kitchen ambient temperature: 8-16C.
It was certainly a risk to attempt culturing my own sourdough.  But it worked!  Though more work needed to perfect the bread.

The original recipe for the starter was from Nourish Kitchen but many _ad hoc_ modifications were made:
- Feeding was dropped to once a day to twice every three days to adjust for the slower growth in the dead of winter.
- Feeding amount was also reduced to 1/4-1/3 cup of flour.
- Instead of throwing excess growth away, I split the starter. This was mostly so I have a parallel experiment. 

The starter's about 12 daya old now.  Growing slow,  but growing. Nice sour aroma. Looked a bit dry this morning,  so may start feeding more often.

25 September 2014

salmon with silverbeet coconut rice


Salmon is a favourite in our household, particularly Atlantic Salmon, which seems to be available all year round in Sydney (as are Ocean Trouts).  Oozing with omega-3 and vitamin D, and so easy to make.  A bit of salt and pepper, a few minutes each side on the pan, and done!  

The challenge is finding a side to accompany complement it and round out the food pyramid; i.e. some veg and starch.  Rice and some kind of soft, wilt-able greens came to mind. While plain rice and fresh salad would have worked find, I wanted something different. And I wanted to integrate (sneak in) the greens with the rice for two preschoolers who will be at dinner.  Coconut-flavoured rice also came prominently to mind, thus, 'tis was how this rice dish was born. 

Silverbeet (Swiss Chard, Spinach) Coconut Rice
Ingredients
- 1 can of coconut milk (size would depend on desired fragrancy; I used a full 400ml can)
- 1 cup of rice
- 3-4 (packed) cups of freshly chopped chard (any soft greens should work)
- pinch of salt

Direction
1)  Add coconut milk and water to pan, to a total volume of ~700ml.  Add a pinch of salt. Bring to boil. 
2)  Add rice, stirring until boiling point is reached again (this prevents the rice from sticking to the bottom of the pot).  Reduce heat to low and simmer, covering, for 15 mins. 
3)  Increase to medium heat.  Stir in greens, one cup at a time. Keep stirring untill all greens are incorporated.  Turn off heat and replace lid.  Let stand for at least 5 mins. 


15 January 2012

blue hubbard quinoa & brown rice casserole

As usual, this dish was inspired by one of the items in our CSA box this week: blue hubbard squash (cucurbita maxima).  We didn't get an entire squash (thank goodness!); I think we got ~3-5lb (6-11kg) which is probably only 5%-10% of the total squash!!  Deborah, our CSA farmer, suggested several ways of preparing it; basically, you can substitute any pumpkin or squash recipe with the hubbard.  I'm not a casserole person by nature, but for some reason, I had a desire (not quite a craving) to have casserole.  Besides, it sounded like something that our little 1yo can eat as well =)

I took inspiration from the both Local Nourishment & Food Buzz. Here is my version:

Ingredients
~3-5lb squash (any winter squash or pumpkin would work)
1/2 cup quinoa
1/2 cup brown rice
5 celery sticks (finely chopped)
6oz mozarrela cheese (grated)
sprinkles of dried basil
sprinkles of crushed dried rosemary
salt & pepper
~2oz cold butter
~1/2 - 3/4 cups course wheat flour (I thought that would provide better texture than white flour)

Steps
1.  Partially bake squash, whole, at 350F for ~35mins (This was so that I can cut into the darn thing!)
2.  While waiting for step (1), soak rice & quinoa in water for at least 15mins (For the quinoa, that's the recommendation I got from the internet.. I've never cooked quinoa before(!). For the rice, I know for a fact that pre-soaking gives a much fluffier texture; the secret to good congee).  Rinse. Bring ~2.5cups of water to boil.  Add rice & quinoa; stirring often to prevent sticking. Once the content reboils, turn down heat and simmer until only ~1tbp water remains. Shut off heat and leave lid on. This will allow the grains to absorb the rest of the liquid without burning. [Of course, if you prefer your rice to be more chewy, use less water and open lid straight after cooking.]
3.  Once squash is ready (out of the oven & cooled enough to handle), cut into small cubes (~0.5" or 1cm).  I did this my slicing around the skin as it was still pretty tough to cut through and I didn't want to destroy my knife. Place cubes in casserole dish.
4.  Add cooked rice & quinoa and finely diced celery to casserole dish. Sprinkle dish with dried herbs & season with S&P.  Toss well.
5.  Cover top with grated mozzarella. [You could also mix the cheese in with the rest of the stuff.] 
6.  Work the butter into the flour and crumb on top of the cheese.
7.  Bake at ~400F for ~30mins for until crumb is golden.  [You may have to play around with the temp and time.  I did as the suggested temp of 350F and suggested time of 15mins did not work for me.]

Here is a photo of the final product:
The verdict?
My opinion: I thought it was good.  The quinoa was really flavorful. The squash was sweet. The celery was soft.. too soft?  Some parts of the crumble dried up a bit.. I wonder if I should have added more butter or a dash of milk?
His opinion:  It's  simple.  Healthy.  I like it.  [I take that to mean he likes it but is not excited by it; not like a bacon club sandwich ;-) ]
Bubby's opinion:  He didn't spit it out (phew!)  In fact, I was happy to have it for lunch for the next few days.  I call that success =D

08 January 2012

marina di chioggia gnocchi

Thanks to Nevermore Farm for the half Marina di Chioggia squash in our first CSA box of 2012!  As suggested, I ventured to make gnocchi... pretty much for the first time in my life.  For the recipe and directions, I followed BOLDO'S THOUGHTS ON FOOD:

I first cut up the half squash into ~palm-size pieces. Roasted them @400F in the oven  for ~1.5hr. Even after that length of time, there were still several pretty firm pieces; probably due to how much I bunched them up on my standard-sized roasteing dish (which in the world of giant squashes is pretty small).  
I made the dough with ~ half the roasted squash (i.e. 1/4 of the total squash) and ~1 cup of whole wheat flour.  For each eighth of the dough, i rolled it up into ~3/4 to 5/4 inch diameter ropes, then cut them into ~1" intervals. 

A quick internet search provided several good YouTube videos of how to roll gnocchi  with a fork.  I eventually got the hang of it after about ~50... 
The total dough made 300-350 gnocchi. I was fairly liberal with the flour to keep them from sticking. 


With the first meal, we had them with a red sauce which I made simply with two cans of fire-roasted tomatoes and 1/2 bag of frozen veggies; I know, not very inventive...   But I made up for it with the second meal where I topped it with saute Hedgehog Mushrooms w/ heirloom carrots. We've been having Hedgehog mushrooms w/ carrots since the mushrooms came into season three weeks ago.  We're hoping to see these little delights again at the Farmer's Market next Saturday (fingers crossed!).

20 November 2010

pineapple quince

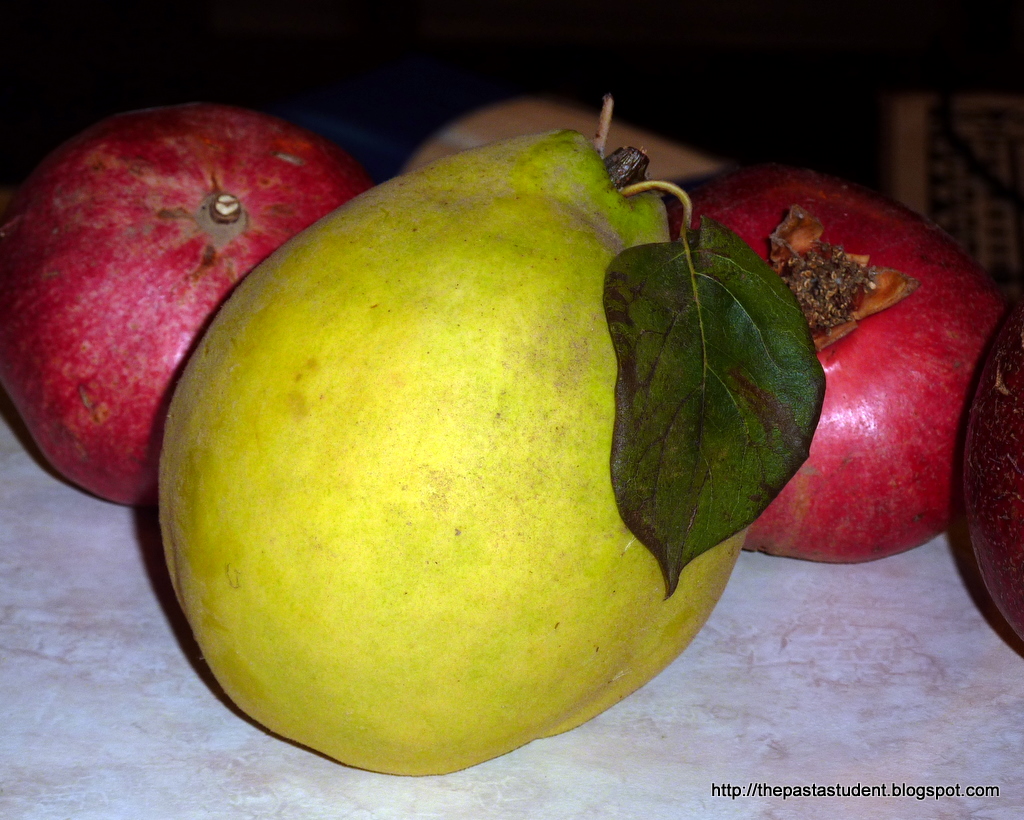
A pineapple quince (in the background are
pomegranates, also from our CSA)
Arrived in our CSA box three weeks ago were a couple pineapple quinces!  This was very exciting for me as although I have heard of and even seen quinces before, I have actually never ever tried one. I don't even think I've had any food made with quince before, at least none that was memorable. Anyway, I was so excited by these unusually large (compared to the "normal" quince that I've seen at the shops) delights that I did a little research and discovered two quince characteristics that intrigued me even more: 
1)  They apparently have an amazing floral fragrance, and 
2)  They blush!  (the cooking process apparently turns them an amazing crimson colour).
Despite my tired pregnant state, this got me back into the kitchen =)   I made two things out of the two quinces: 


Two containers of dulce de membrillo
from a single quince. 
dulce de membrillo
The recipe I tried was inspired by The Traveler's Lunchbox, which was very similar to many of the other recipes on the internet; this is unsurprising as this spread is really simple to make!!  The reason for this is that quinces are naturally rich in pectin allowing them to be turned into jelly extremely easily. The only things I did differently were:
1)  I added the juice of a lime, prompted by a separate article I read, and 
2)  I only added about 1/4 cup of sugar (much less than asked for) for the one quince I had (I don't have a kitchen scale so did not measure the exact weight of quince or sugar).  
It turned out fantastically!!!  The only disappointment was that the membrillo did not turn as red as I had hoped. I attributed this to this particular variety of quince.  Nonetheless, I was happy with how they turned out and was eager to try them with some manchego cheese we bought just for this =P  Coincidentally, we were able to share the first batch with some friends, one of whom was Argentinian and I was delighted to watch her snack on my dulce de membrillo as she told us how her family used to make these all the time =)  


Poached quince
poached quince with vanilla and cinnamon
For this, I adapted the recipe from the wednesday chef. Interestingly, this was actually the first time I cooked with vanilla beans as well (I've always just used vanilla essence)!  I was delightfully surprised by the vanilla's aroma!  Between this and the cinnamon, the aroma of the poached quince was just heavenly.  Unfortunately, as with the dolce de membrillo, the only disappointment was the lack of ruby hue I was really hoping for =(  Although no icing on the cake, the cake still tasted darn good ;-) 
We drank most of the syrup as we ate the quince though the wednesday did suggest stirring it into tea (I'm sure it's a really good suggestion if you are a tea drinker who also happens to add sugar to your tea). 


The notable absence of these delights in our subsequent CSA boxes saddened me... but then, I saw them at the Farmer's Market =D  I think poached quince will be on our (first) Thanksgiving menu this year =) 

07 September 2010

salmon and cucumber filo

After several disappointments, we recently decided to join yet another CSA: Nevermore Farm.  Two things that set this one apart from the others were: (1) it was recommended by a friend, and (2) they were amazingly obliging! One of our problems with CSAs in the past was that we often get way more veggies than we can consume. But Nevermore was able to fulfill our requests of a delivery only once every two weeks and for each box to have a higher fruit to veggie ratio (it is much easier to snack on fruits than veggies!)!! We received our first box last Thursday and we were very satisfied =)
One of the intriguing ingredients that came with the box was two funny looking cucurbits. Several Google image searches suggested they could be Armenian cucumbers.  Neither of us are really cucumber fans and despite cyberspace's positive opinions, we failed to see their uniqueness... However, not one to waste food, we decided to make something out of it, and this is when I came across this recipe: Smoked Salmon and Cucumber Nest. As with most other recipes I find, I modified it based on what I had at home at the time.  Although I don't know how the original recipe would have tasted, I quite enjoyed my version ;-)  I especially like this recipe because (1) it was dead easy to make (meaning I was not grumpy to cook after a long day's work), and (2) it was healthy!

ingredients
1/2 can ~15oz (425g) pink salmon in brine (we made two meals out of this can)
2 sheets of filo pastry
1 cup of coarsely grated cucumber
1/4 cup crumbed feta cheese
Melted butter

procedure
1.  Prepare filling: Using a fork, shred the salmon. Squeeze out as much water as you can from the grated cucumber. Combine and mix well the salmon, cucumber, and cheese.  
2.  Prepare the "nest": Cut the sheets in half to make four sheets. Stack the four sheets on top of each other, brushing each layer with melted butter. Divide (cut with a sharp knife) the stacked sheets into six equal sized rectangles, each large enough to fit into your muffin tins. Gently pressed them into six holes of your muffin pan; they should be like cupcake cups. Bake until slightly golden at temperature according to the filo manufacturer's directions
3.  Take the slightly golden filo cups out of the oven and fill each cup with the salmon and cucumber mixture. Return to oven and bake for another 3-6mins or until filo has reached desired browness. ( Alternatively, one could bake the filo cups until done, fill the cups with the mixture and serve without rebaking. )
4.  Gently remove from muffin tin and serve immediately. 

Enjoy.